
Exploring the Arduino MKR ETH Shield I2C Port: A Comprehensive Guide
The Arduino MKR ETH Shield is a versatile expansion board designed for the Arduino MKR family. One of its standout features is the I2C port, which allows for easy communication with various I2C devices. In this article, we will delve into the details of the I2C port on the Arduino MKR ETH Shield, exploring its capabilities, usage, and potential applications.
Understanding the I2C Protocol
Before we dive into the specifics of the I2C port on the Arduino MKR ETH Shield, it’s essential to understand the I2C protocol itself. I2C, or Inter-Integrated Circuit, is a two-wire serial communication protocol that allows multiple devices to communicate with each other on a single bus. The two wires are the data line (SDA) and the clock line (SCL). Devices connected to the I2C bus can be masters or slaves, with the master device initiating communication.

Features of the Arduino MKR ETH Shield I2C Port
The I2C port on the Arduino MKR ETH Shield offers several key features:
| Feature | Description |
|---|---|
| Two-Wire Interface | The I2C port uses the SDA and SCL lines for communication, allowing for easy connection to I2C devices. |
| Multiple Devices Support | The I2C bus can accommodate multiple devices, making it suitable for complex projects with various sensors and modules. |
| High-Speed Communication | The I2C protocol supports high-speed communication, with data transfer rates up to 3.4 Mbps. |
| Addressable Devices | Each I2C device has a unique address, allowing for easy identification and communication. |
These features make the I2C port on the Arduino MKR ETH Shield an excellent choice for a wide range of applications, from simple sensor readings to complex multi-device systems.
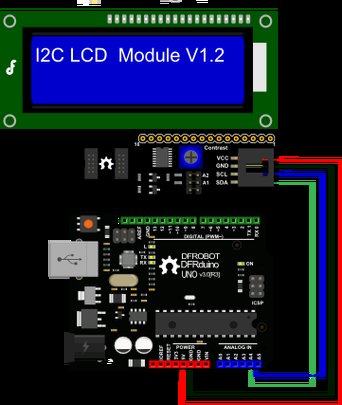
Connecting I2C Devices to the Arduino MKR ETH Shield
Connecting I2C devices to the Arduino MKR ETH Shield is straightforward. Most I2C devices come with a 4-pin connector, which includes the VCC, GND, SDA, and SCL lines. To connect a device to the I2C port on the Arduino MKR ETH Shield, follow these steps:
- Connect the VCC and GND lines of the I2C device to the corresponding pins on the Arduino MKR ETH Shield. The VCC pin on the device should be connected to the 3.3V pin on the shield, and the GND pin should be connected to the GND pin on the shield.
- Connect the SDA line of the I2C device to the SDA pin on the Arduino MKR ETH Shield. Similarly, connect the SCL line of the device to the SCL pin on the shield.
- Ensure that the I2C device is powered on and ready for communication.
Once the connections are made, you can start communicating with the I2C device using the Arduino IDE and the Wire library, which is included in the IDE.
Using the Wire Library for I2C Communication
The Wire library in the Arduino IDE provides a simple and straightforward way to communicate with I2C devices. To use the library, follow these steps:
- In your Arduino sketch, include the Wire library by adding the following line at the beginning of your code:
- “`cppinclude <Wire.h>“`
- Initialize the Wire library by calling the
beginfunction in thesetupfunction: - “`cppvoid setup() { Wire.begin();}“`
- Use the Wire library functions to send and receive data from the I2C device. For example, to read data from an I2C sensor, you can use the
requestFromfunction: - “`cppvoid loop() { int numBytes = Wire.requestFrom(sensorAddress,


")