
Add ETH to MetaMask: A Comprehensive Guide
Adding Ethereum (ETH) to your MetaMask wallet is a crucial step for anyone looking to engage with the decentralized finance (DeFi) ecosystem or simply hold ETH for investment purposes. In this detailed guide, I’ll walk you through the process step by step, ensuring you have a seamless experience.
Understanding MetaMask
MetaMask is a popular cryptocurrency wallet that allows users to store, send, and receive Ethereum and other ERC-20 tokens. It’s a browser extension that integrates with your web browser, making it easy to interact with decentralized applications (dApps) and smart contracts.

Setting Up MetaMask
Before you can add ETH to your MetaMask wallet, you need to set it up. Here’s how to do it:
- Go to MetaMask’s website and download the extension for your browser (Chrome, Firefox, Brave, etc.).
- Follow the installation instructions for your specific browser.
- Once installed, open the extension and click on “Create a new wallet.”
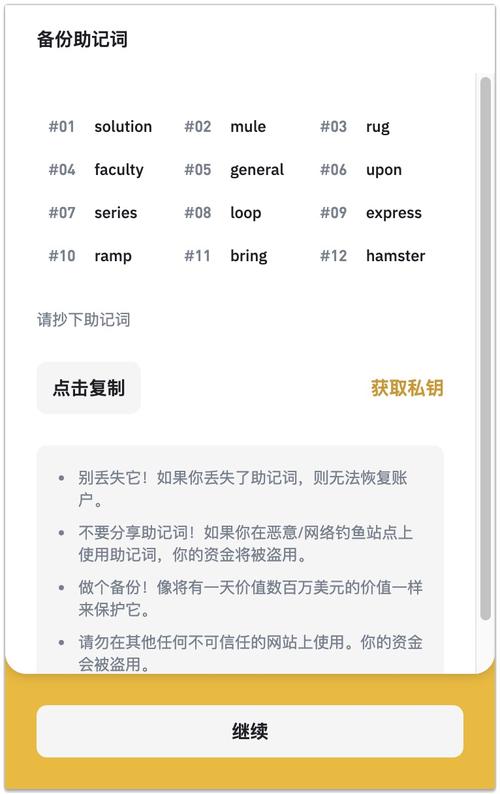
- Set a strong password for your wallet and write down your seed phrase. This phrase is crucial for recovering your wallet if you lose access to it.
- Click “I’ve written down my seed phrase” to proceed.
- Choose a name for your wallet and click “Next.”
- Confirm your wallet name and click “Next.”
- Your wallet is now set up. You can see your Ethereum address and public key.
Adding ETH to MetaMask
Now that you have MetaMask set up, let’s add ETH to your wallet:
- Go to an exchange or a cryptocurrency wallet that supports ETH. Some popular options include Coinbase, Binance, Kraken, and MyEtherWallet.
- Log in to your account and navigate to the section where you can send or withdraw ETH.
- Enter your MetaMask address as the recipient. Make sure to double-check the address to avoid sending ETH to the wrong wallet.
- Enter the amount of ETH you want to send. You can choose to send a specific amount or the entire balance.
- Review the transaction details and confirm the transaction. You may need to pay a gas fee to complete the transaction.
- Wait for the transaction to be confirmed. This process can take a few minutes to several hours, depending on the network congestion.
Verifying the Transaction
After the transaction is confirmed, you can verify it on the Ethereum blockchain:
- Open your MetaMask wallet.
- Click on the “Account” tab to see your ETH balance.
- Click on the “Activity” tab to view your transaction history.
- Look for the transaction that you sent. It should show the amount of ETH you sent and the transaction fee.
- Click on the transaction to view more details, such as the transaction hash and the block number.
Using ETH in MetaMask
Now that you have ETH in your MetaMask wallet, you can use it to interact with dApps, buy NFTs, or simply hold it as an investment:
- Open a dApp or a website that accepts ETH.
- Connect your MetaMask wallet to the dApp by clicking on the MetaMask icon and selecting your wallet.
- Follow the instructions on the dApp to complete the transaction, such as buying a token or participating in a liquidity pool.
Security Tips
While using MetaMask and ETH, it’s important to keep your wallet secure:
- Never share your seed phrase with anyone. It’s the key to your wallet and can be used to steal your ETH.
- Keep your MetaMask extension updated to the latest version to ensure you have the latest security features.
- Be cautious of phishing scams. Never click on suspicious links or provide your private key to anyone.
Conclusion
Adding ETH to your MetaMask wallet is a straightforward process that opens up a world of possibilities in the Ethereum ecosystem. By


")
